Drone inspection for historic building restoration in California: A practical guide
Key Takeaways
A thoughtful drone inspection can give restoration teams a safer, clearer view of a historic building before repair work begins.
- Define preservation, safety, and moisture priorities before planning the flight.
- Use qualified operators who understand FAA rules and sensitive building sites.
- Match cameras and mapping methods to the questions the inspection must answer.
- Convert imagery into prioritized repair information, not just a large photo archive.
- Coordinate aerial documentation with engineers, conservators, owners, and contractors.
Why drones are valuable for historic building restoration
Historic buildings often combine fragile materials, complex ornament, steep roofs, and areas that are difficult to reach without substantial temporary access equipment. A drone can document exterior conditions while keeping inspectors on the ground and reducing disturbance around the property. The value is not simply getting an aerial view; it is creating usable evidence for decisions about repair, preservation, and ongoing maintenance.
Detecting facade, roof, and masonry defects
Close-range visual imagery can reveal displaced units, open joints, spalling, failed sealants, damaged flashing, and changes around windows or cornices. A flight should be planned to capture both broad elevations and detailed views of representative defects. That combination helps a team understand whether a problem is isolated or repeated across the facade.
On an older building, apparent defects can have several causes. Staining may point to drainage or flashing problems, while a crack may relate to movement, weathering, or an earlier repair. Drone imagery does not replace hands-on assessment or engineering judgment, but it can help identify where those follow-up investigations deserve attention.
Reaching hazardous or inaccessible areas
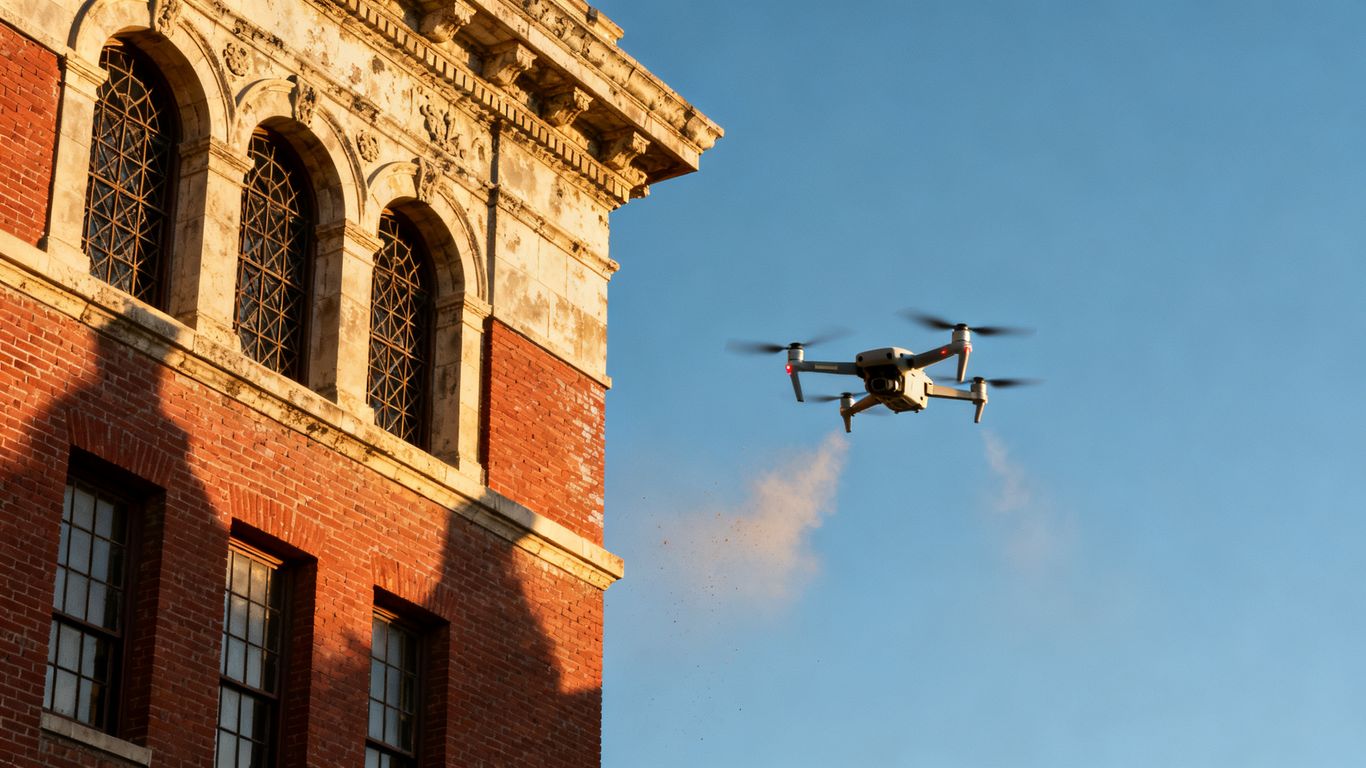
Roofs, towers, parapets, and upper ornament can expose workers to falls, unstable masonry, traffic, or difficult rigging conditions. A drone can inspect these areas from a controlled distance, although the flight still requires a site-specific safety plan and careful attention to wind, obstacles, and people below.
This approach is especially useful during an initial condition survey. Teams can first identify areas that warrant closer examination, then limit scaffolding, lifts, or rope access to locations where physical contact is genuinely necessary. That staged approach can reduce disruption without treating aerial imagery as a substitute for every inspection method.
Creating visual records for restoration planning
A repeatable image set gives owners and consultants a shared reference for discussing conditions. It can show the relationship between a damaged feature and the surrounding wall, roof plane, drainage path, or architectural detail. It also creates a baseline that can be revisited after stabilization or repair.
For teams comparing methods, this facade inspection guidance offers useful background on why exterior assessments can be difficult and disruptive. The practical lesson is to define the documentation standard in advance: image naming, elevation labels, location references, and the level of detail needed for specifications should all be agreed before the flight.
Planning a drone inspection in California
A successful inspection begins well before the aircraft leaves the ground. Historic properties vary widely in height, setting, materials, occupancy, and documentation needs, so a generic flight plan is rarely sufficient. The team should decide what information is needed, who will interpret it, and how the results will fit into the restoration workflow.
Defining the building’s historic and structural priorities
Start with available drawings, previous condition reports, photographs, maintenance records, and any statement of significance. Mark character-defining features separately from later additions, because the inspection may need different image coverage and different repair sensitivities for each. Structural engineers and preservation professionals can then identify priority areas such as movement, water entry, unstable ornament, or deteriorated roof edges.
A useful brief describes questions rather than merely listing elevations. For example, it might ask whether staining continues behind a cornice, whether mortar loss is concentrated on a weather face, or whether a previous patch is separating from historic material. Specific questions make the resulting imagery easier to review and less likely to become an unstructured collection of photographs.
Choosing inspection areas, flight paths, and weather conditions
The flight plan should divide the building into logical zones and establish safe stand-off distances, takeoff and landing areas, emergency procedures, and image angles. Wind, rain, glare, shadows, nearby wires, trees, and reflective glass can all affect the quality of the record. Historic ornament also benefits from oblique views that reveal depth and surface loss rather than relying only on straight-on elevations.
A preflight checklist keeps the work consistent across a complicated site:
- Confirm the inspection boundary and no-fly or restricted areas.
- Identify people, vehicles, overhead lines, cranes, and temporary structures.
- Set image overlap, camera angles, naming conventions, and coverage targets.
- Establish weather limits and a decision point for postponing the flight.
After the flight, the operator should confirm that each planned zone has usable coverage before leaving. If glare or wind compromised a critical view, recording that limitation is better than quietly treating the missing image as complete documentation.
Coordinating with owners, conservators, engineers, and contractors
The property owner or facility manager can explain access, occupancy, security, and sensitive operations. Conservators can identify fragile finishes or features that should not be approached closely, while engineers can specify the views needed to evaluate movement or structural concerns. Contractors may also need clear references to plan temporary protection, access, or repair sequencing.
Coordination should include a simple delivery meeting after the inspection. Reviewing representative images with the project team helps confirm that labels make sense and that the report distinguishes observation from interpretation. It also keeps the aerial survey aligned with the restoration budget and schedule rather than treating it as a separate technical exercise.
Understanding California regulations and site constraints
California projects must account for federal aviation requirements as well as local conditions around the property. A historic building may sit near an airport, busy road, school, event venue, or neighboring property, creating constraints that are not visible on a basic site plan. Regulatory planning is therefore part of inspection quality, not paperwork added at the end.
Meeting FAA requirements for commercial drone operations
Commercial operators generally work within the FAA framework for remote pilots and operational limits, including the requirements associated with Part 107. The responsible operator should verify pilot qualifications, aircraft registration where applicable, airspace status, operating limitations, and any needed authorizations before scheduling the work.
The project team should also clarify who is responsible for the flight approval process and what happens if conditions change. A compliant plan still needs practical controls for visual line of sight, people below, weather, battery management, and emergency landing areas. These details protect the site and make the inspection easier to defend in a project record.
Managing flights near airports, people, roads, and neighboring properties
Dense California neighborhoods can make a seemingly simple facade flight surprisingly complex. Roads bring moving vehicles, sidewalks bring pedestrians, and adjacent buildings may create privacy and clearance concerns. The operator should define a controlled operating area, coordinate with the owner, and use observers or other procedures when appropriate.
The inspection brief should also explain how incidental views of neighboring properties will be handled. Images should stay focused on the project building, be stored securely, and be shared only with the people who need them. Where public activity cannot be controlled, rescheduling or changing the flight path may be the safest choice.
Addressing historic-district rules, privacy, and local permits
A local historic-preservation office or property authority may have requirements for work affecting a landmark or district, even when the drone is not physically touching the building. Ask whether a notice, permit, owner authorization, traffic-control plan, or site-specific condition applies. Requirements can differ between municipalities and between public and private property.
Privacy deserves equal attention. Avoid unnecessary interior views, private yards, or identifiable people, and set a retention policy for raw imagery. Clear communication with tenants, neighbors, and site staff can prevent a technically legal flight from becoming a source of conflict.
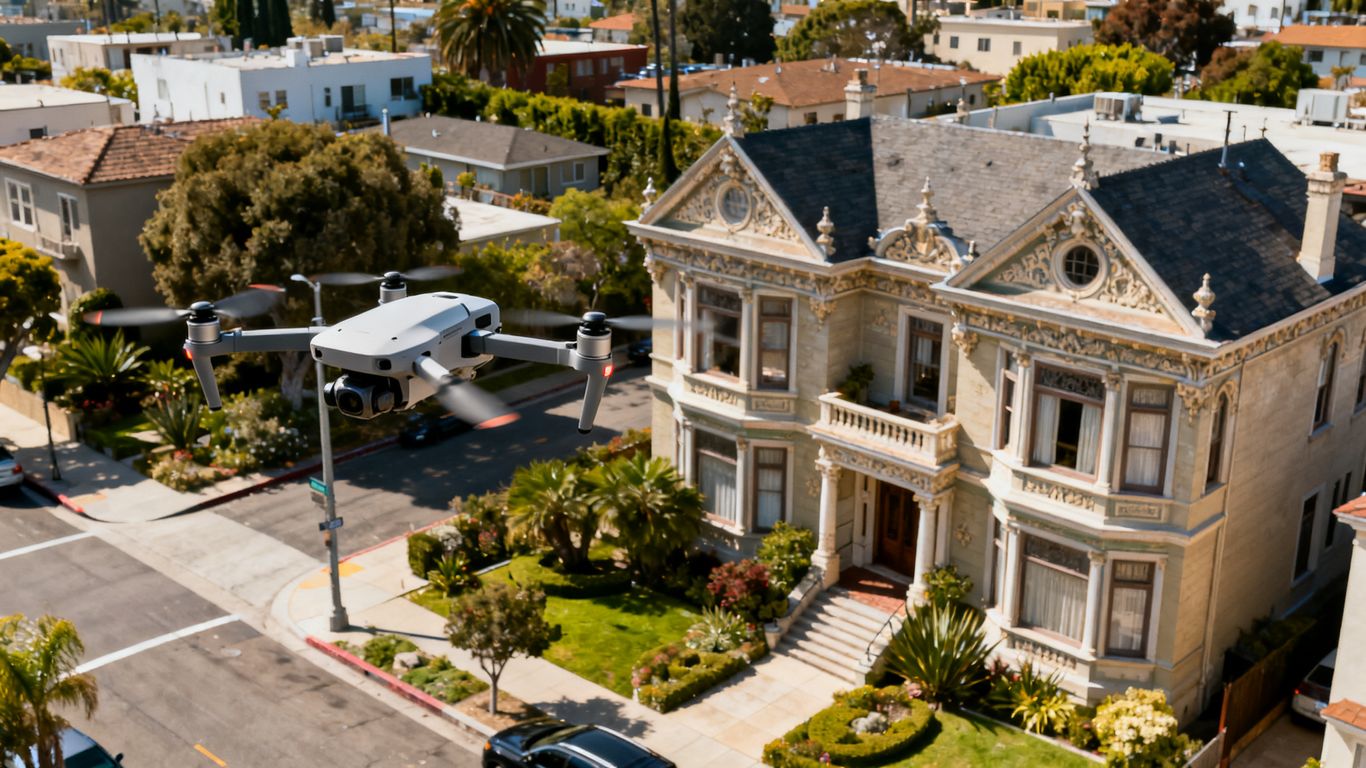
Choosing the right drone and inspection technology
The best equipment depends on the condition questions, building scale, required detail, and final deliverables. A high-resolution camera may be enough for a close visual survey, while thermal imaging or a mapping workflow may answer a different question. Equipment selection should follow the restoration brief rather than the other way around.
Comparing high-resolution, thermal, and zoom cameras
High-resolution visual cameras are suited to documenting joints, cracks, surface loss, flashing, windows, and ornament. Optical zoom can help the operator inspect details from a safer stand-off distance, though image sharpness, lighting, motion, and distance still matter. Thermal cameras can reveal patterns associated with moisture or temperature differences, but thermal observations require careful interpretation and favorable conditions.
A thermal image is not automatically proof of water intrusion or material failure. It is a clue that should be compared with visible staining, weather history, interior observations, or targeted investigation. For projects where that capability fits the question, Aeroskape describes Thermal Drone Inspections as producing high-resolution thermal images to help identify water infiltration and other anomalies; the resulting information is for informed decision-making, not a replacement for professional diagnosis.
Using LiDAR and photogrammetry for detailed 3D models
Photogrammetry can turn overlapping photographs into a textured three-dimensional representation of the building, while LiDAR can provide a different type of spatial data for selected applications. Both methods require appropriate capture geometry, coverage, processing, and quality checks. The deliverable should be chosen based on how the team will use it, whether for visual coordination, measurements, design context, or comparison over time.
A 3D model can help a team discuss the relationship between a roof edge, facade plane, and architectural feature without relying on separate photographs. Aeroskape’s drone 3D modeling materials describe LiDAR and photogrammetry for creating detailed digital representations of existing structures. Such models should be clearly labeled with their intended accuracy and should not be presented as a legal or professional land survey.
Selecting pilots with building inspection and historic preservation experience
A skilled pilot needs more than aircraft familiarity. Ask how the operator plans close facade work, manages prop wash near fragile materials, documents limitations, and communicates with the preservation and engineering team. Experience reading building conditions is valuable because it shapes the flight path and the usefulness of the final record.
The operator should also provide a sample deliverable, insurance information, safety procedures, and a clear explanation of what is and is not included. A good fit is someone who can work within the project team’s vocabulary while remaining careful not to overstate what aerial imagery proves.
Conducting the inspection and documenting conditions
Field execution should follow the approved plan but remain responsive to real conditions. The operator should pause when people enter the operating area, visibility changes, or wind affects stability. Meanwhile, the inspection lead should track coverage and note observations that will need a closer look during processing.
Capturing consistent images of walls, roofs, windows, and ornamentation
Begin with broad establishing images, then move through each elevation in a predictable sequence. Capture corners, transitions, roof edges, openings, drainage components, ornament, and representative areas of repeated damage. Oblique and straight-on views work together: one shows context, while the other supports closer comparison.
Consistency matters more than producing a huge number of files. Use stable camera settings where practical, maintain useful overlap, and photograph a scale reference only when it can be done safely and appropriately. Each image should be traceable to a building elevation, level, grid, or feature name.
Using control points and repeatable flight plans for accurate mapping
Mapping requires more discipline than casual aerial photography. Control points or other reference methods can help align imagery, while repeatable flight paths make later comparisons more meaningful. The team should record the capture date, weather, equipment, processing settings, and known limitations alongside the final model or orthomosaic.
For projects that may be revisited, save the flight plan and establish stable reference locations that will remain identifiable. This makes it easier to compare apparent changes over time without confusing a different camera angle or lighting condition with a new defect.
Recording cracks, moisture, material loss, and previous repairs
Field notes should separate what is visible from what is suspected. Describe the location, approximate extent, pattern, surrounding material, and relationship to openings or drainage. Previous repairs deserve their own notation because a patch, coating, or replacement unit may behave differently from adjacent historic fabric.
A practical condition record might include the following fields: feature identifier, elevation, defect type, image references, apparent severity, recommended follow-up, and reviewer. Those fields give the restoration team a consistent way to move from image review to investigation and scope development.
Turning drone data into restoration decisions
Aerial data becomes valuable when it changes what the team does next. The review process should connect observed conditions to safety, water management, preservation priorities, access planning, and future monitoring. Raw imagery alone can leave decision-makers with more files but not necessarily more clarity.
Prioritizing urgent safety and water-intrusion issues
Start with conditions that could harm people or accelerate deterioration: loose masonry, unstable ornament, exposed openings, failing roof edges, and active water pathways. Mark these separately from lower-priority cosmetic issues. A clear priority system helps owners direct limited funds toward stabilization and damage prevention.
The report should state the basis for each priority and identify when an engineer, conservator, roofer, or other specialist needs to investigate. Drone observations can guide that next step, but they should not be written as a definitive structural diagnosis when the imagery cannot establish one.
Separating historic fabric from modern alterations
Restoration decisions depend on knowing what is original, what is an early alteration, and what is a recent repair. Compare current imagery with archival photographs, drawings, material studies, and site observations. Differences in mortar, color, texture, joint pattern, or detailing may help the team identify phases, but visual evidence should be tested against documentary and physical evidence.
This distinction prevents a modern patch from being mistaken for historic fabric and avoids recommending treatment that would erase useful building history. It also gives contractors clearer direction when repair areas cross several materials or construction periods.
Delivering reports, annotated images, orthomosaics, and 3D models
A useful package starts with a short executive summary and a map or elevation index. It can then include annotated photographs, condition schedules, orthomosaics, 3D models, metadata, and a list of limitations. Organize files so an owner can find a specific elevation or defect without relying on the person who operated the drone.
The delivery format should match the audience. Engineers may need structured condition references, conservators may want detailed material views, and contractors may need clearly marked repair zones. Aeroskape’s Commercial Drone Inspection service information describes high-resolution imagery, terrain visualization, and 3D aerial modeling for decision support on hard-to-reach areas; the restoration team should still define the exact deliverables before work begins.
Estimating costs and integrating drone inspections into restoration work
Inspection pricing depends on more than building height. Access, airspace, site density, image detail, processing, reporting, travel, weather, and the number of elevations all affect the effort. A low initial quote may not include the mapping, annotation, or review time needed to make the information useful to a restoration team.
Understanding factors that affect inspection pricing
Ask for a scope that separates field capture from processing and reporting. That makes it easier to compare proposals and to decide whether optional thermal, mapping, or repeat-visit work is worthwhile. The scope should also state how many flights, images, models, revisions, and stakeholder meetings are included.
Typical cost drivers include:
- Building height, footprint, ornament, and number of elevations.
- Airspace coordination, traffic control, observers, and site access.
- Camera requirements, thermal capture, LiDAR, photogrammetry, or zoom detail.
- Processing time, annotations, condition schedules, and report complexity.
- Travel, weather contingencies, repeat flights, and progress documentation.
These categories help the owner compare like with like. They also reveal when a more modest visual survey is sufficient and when a detailed model or specialized sensor could prevent a costly return visit.
Comparing drone surveys with scaffolding, lifts, and rope access
Traditional access remains necessary for tactile examination, sampling, repairs, and locations where a drone cannot obtain reliable evidence. Its cost and disruption may be substantial, however, particularly when sidewalks, roads, tenants, or fragile landscaping are involved. A drone survey can often serve as an early screening and documentation step before the team commits to extensive access equipment.
The right comparison is not “drone versus every other method.” It is a planned combination: aerial imagery for broad coverage and difficult views, followed by targeted physical access where the evidence calls for it. That sequence can reduce unnecessary setup while preserving the hands-on investigation restoration work sometimes requires.
Scheduling follow-up inspections and progress documentation
Build follow-up capture into the restoration schedule when conditions may change or repairs will be phased. Repeat imagery can document temporary stabilization, completed masonry work, roof repairs, coating application, and areas that remain outstanding. Use the same reference system and, where practical, comparable flight paths so changes are easier to interpret.
A final progress package should distinguish completed work from open items and note any areas that were inaccessible. When the project closes, retain the baseline and follow-up records with the building’s maintenance documents. That turns a one-time inspection into a useful reference for future stewardship.
Conclusion
Drone inspection for historic building restoration in California works best as part of a disciplined preservation and engineering process: define the questions, plan a compliant flight, capture consistent evidence, and deliver information that supports real decisions. The method can reduce exposure to hazardous access conditions and improve visibility into hard-to-reach areas, while professional judgment remains essential for diagnosis and treatment. For a project-specific aerial inspection or documentation plan, request a consultation with Aeroskape.
Frequently Asked Questions
Can a drone replace a traditional historic building inspection?
No. Drone imagery can improve access and documentation, but hands-on examination, testing, archival research, and professional judgment may still be necessary for diagnosis, structural evaluation, and treatment planning.
What parts of a historic building are best suited to drone inspection?
Facades, roofs, towers, parapets, cornices, upper windows, chimneys, and other difficult-to-reach exterior features are often good candidates, provided weather, airspace, and site conditions allow safe operation.
Can drone imagery identify water intrusion?
Visual and thermal imagery may reveal patterns associated with moisture or water entry. Those observations should be treated as indicators for follow-up investigation rather than conclusive proof of a leak or concealed damage.
Are special permissions required to fly near a historic building?
Potentially. Requirements may involve FAA rules, controlled airspace, local permits, property authorization, traffic management, privacy concerns, and rules for historic districts or landmarks. The operator should verify conditions before the flight.
How should restoration teams prepare for a drone inspection?
Gather existing drawings, photographs, condition reports, and maintenance records; identify priority questions; coordinate access and occupancy; define deliverables; and make sure the operator understands fragile features and site hazards.
What should a drone inspection report include?
A report may include an executive summary, site and elevation references, annotated images, condition descriptions, orthomosaics, 3D models, metadata, limitations, and recommendations for targeted follow-up by the appropriate specialists.
How often should a historic building be documented with drone imagery?
The interval depends on the building’s condition, exposure, maintenance cycle, active restoration work, and known risks. Baseline documentation followed by event-based or scheduled follow-up flights is often more useful than an arbitrary interval.